The tools
Add rest measures
Adds ‘rest measures’ to the staves that have less measures then the active staff.
This tool completes the staves that have less measures than the active staff with ‘rest measures’(*).
The tool parameters determine whether or not the hidden staves are processed.
(*)A ‘rest measure’ is constructed from a copy of the corresponding measure in the active staff, replacing notes, chords and restchords with rests of the same duration and leaving the other objects as they are.
Tool parameters window:

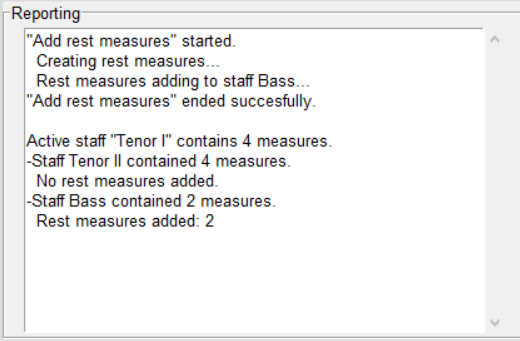
Reporting example:
Analyse score
Creates an analysis report of the score.
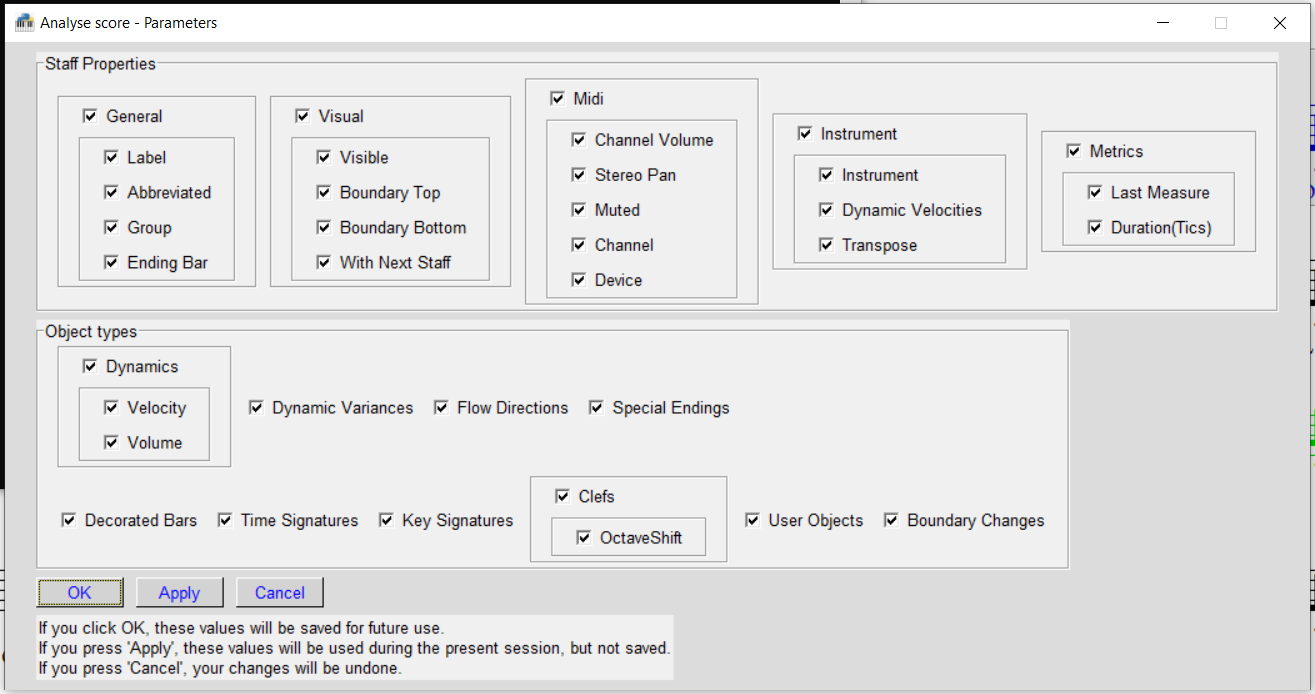
The analysis of the score is divided into several analysis groups. You can see these groups in the ‘Tool Parameters’ window.
There are 2 categories of groups:
The ‘Staff Properties’ groups: they report several staff properties.
The ‘Object Type’ groups contain the measure numbers for each particular value of the main property for a certain object type.
For some object types, extra properties can be reported (e.g. velocity and volume for dynamics).
In the ‘Tool Parameters’ window, you can uncheck the groups and/or properties that you want to exclude from the analysis.
The results are presented on a window with one tab per group.
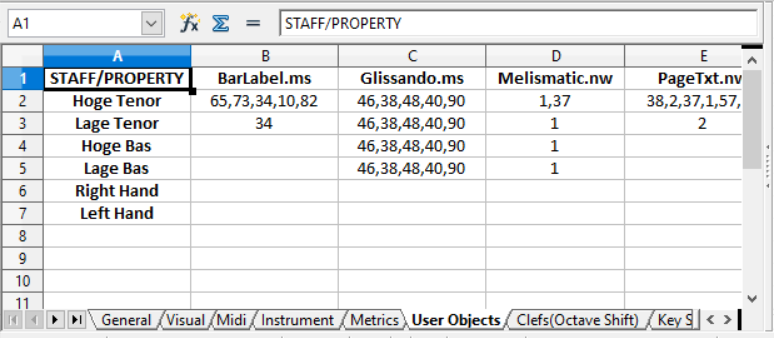
When the ‘OK’ button of this window is pressed, the report can be saved into a xlsx file by pressing ‘Save as’ on the main window. In this file, the results are presented in one sheet per group.
Tool parameters window:
Analysis window example:

Analysis xlsx file example:
Audit score
Audit score
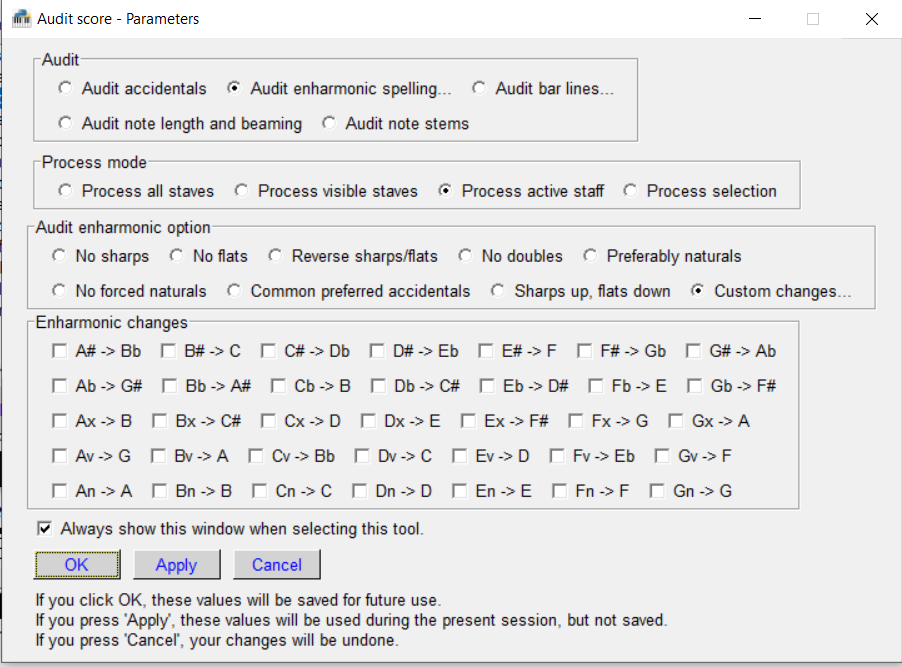
Before running this tool, be sure to select in the tool parameter window the audit you want to be performed. Also specify the process mode: all staves, visible staves, active staff or the selection. Depending on the audit you choose, additional options will be shown. See below for details per audit.
- Audit accidentals:
Via the tool parameters you can select one of this options for handling natural accidentals:
Leave naturals unchanged
Make courtesy accidentals
Remove accidentals
This audit acts on any unnecessary accidentals assigned to notes. It compares a note with an accidental with the ‘running’ key signature, which is determined by the previous key signature + the preceding accidentals in the measure. If the accidental matches the running signature, and it’s not a courtesy accidental, it will be removed if it’s not a natural. For naturals the action taken depends on the option in the tool parameters.
- Audit bar lines:
Audits the bar line alignment. In the tool parameters you can indicate whether you want to admit a short first measure (anacrusis). If the audit finds a standard bar line that is not aligned properly, it is removed and a new bar line is added in the proper place. As a result, notes and chords can be split and tied.
Measures with a special ending that is not at the beginning of the measure, are not audited.
- Audit enharmonic spelling:
Replaces notes with their enharmonic equivalents. There are several options you can choose from (see below), via the tool parameters. If your process mode = ‘Process selection’, and an enharmonic change is to be done on a note, the following notes in the same measure or which are tied to the changed note, are investigated to determine if they need to be changed also. If affirmative, they will be added to the selection.
- Available options:
‘No sharps’: All sharps are replaced.
‘No flats’: All flats are replaced.
‘Reverse sharps/flats’.
‘No doubles’: All double sharps and double flats are replaced.
‘Preferably naturals’: If a enharmonic equivalent without accidental is possible, it’s used.
- ‘No forced naturals’:
If a natural accidental is caused by an preceding note with an accidental, this preceding note is replaced by its enharmonic equivalent.
‘Common preferred accidentals’: A# -> Bb, Db -> C#, D# -> Eb, Gb -> F#, Ab -> G#.
- ‘Sharps up, flats down’:
If the next note is a tone or a semitone higher, a sharp is used; if it is a tone or a semitone lower, a flat is used (not applicable to chords and restchords).
‘Custom changes’: You can choose one or more items from a list of all possible enharmonic changes.
- Audit note length and beaming:
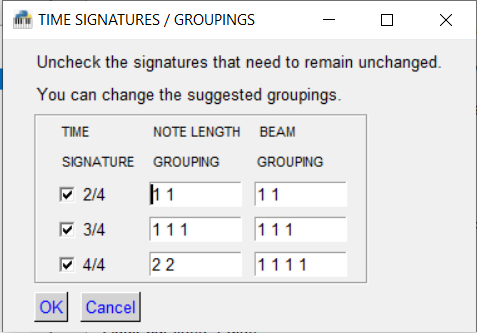
Splits notes and group beamings, according to the time signatures. Upon start, a window is shown with the default groupings for note length and beaming, for each found time signature. You can accept or modify them. The specifications mainly come from @hmmueler (see https://forum.noteworthycomposer.com/?topic=10050.msg72212#msg72212).
Note, chord and rest lengths are distributed in each measure according to standard rules(see e.g. Elaine Gould, Behind Bars, pp. 160-164, 166-169, 171).
Rest chords, chords with different durations, triplets, or notes with a ‘Staccato’, ‘Staccatissimo’, ‘Accent’ or ‘Marcato’ articulations will not be split.
Beams connect notes and chords according to standard rules (see e.g. Elaine Gould, Behind Bars, pp. 153-155).
The main and secondary beat patterns are derived from the currently active time signature.
It ‘s possible to specify alternative beat patterns for a time signature, both for the note lengths and beams.
A long note that starts at a beat and spans over several beats, will not be split.
If the first measure of the score or selection is a short measure, it is treated as the right part of the full beat pattern.
When a special ending is found that’s not at the beginning of the measure, the remaining of the measure is not audited.
A measure that is longer than the current time signature indicates causes an error message.
- Audit note stems:
Removes unnecessary stem up or down attributes and resets stem directions for note beams and triplets.
Tool parameters window:
Audit notelength and beaming window:
Color beams, slurs and triplets
Colors beams, slurs and triplets in the selection.
When you select notes in a NWC file and change the color, the beams, slurs and triplet bracket still have the old color.
With this tool, the necessary markers and beam objects are created, so that everything will be colored.
It contains an algorithm to determine the position and final stemlength of the beam object and the position of the triplet and slur marker, but maybe you need to change them for an optimal result.
The tool operates on the selection you made on the score. The objects with a default color will get the color of the first selected object.
Reporting example:

Color flow changes
Colors flow changes.
This tool colors all items that change the direction of the flow:
flow direction objects(Coda, Segno, Fine, …, D.S. al Fine)
repeat bars
special endings
Via ‘Tool Parameters’ you can set:
the color for the flow change objects
the staves to be processed
Tool parameters window:
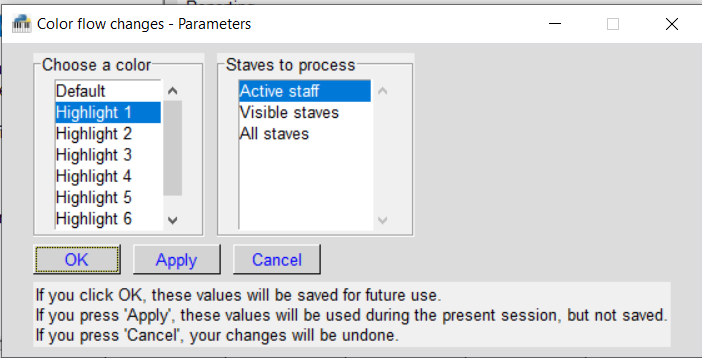
Reporting example:

Configure new song
Configure a new song file.
Run this tool after you created and saved a new file from a template, and before you start changing staff labels, channels, …, removing some staves, inserting tempo, key and time signatures, dynamics, copying and pasting… All that can be done in one go, with this tool.
On the main dialog window, you see on the left a list of all the staves with attributes name, label, group, channel, volume, stereo pan, muted and visible. Each of these attributes is changeable. In front of each staff line is a checked check box. Unchecking a box will remove the corresponding staff from the file (1).
Via the buttons at the right you can configure the properties of objects you want to be inserted. Clicking one of them will open a dialog window, similar to the correspondent ‘Notation Properties’ window of NWC. They have 4 buttons at the right; ‘Create’, ‘Modify’, ‘Remove’ and ‘Cancel’.
With ‘Create you schedule the insertion of the correspondent object.
With ‘Modify’ you can change the properties of a scheduled object.
With ‘Remove’ you undo a scheduled insertion.
With ‘Cancel’ you quit the window without any resulting action.
At the bottom of the main window is indicated which objects are scheduled for insertion.
- When clicking the ‘OK’ button at the bottom of the main dialog window (2):
the staff changes will be carried out (3);
the unchecked staves will be removed;
the scheduled objects will be created and inserted in every staff, after the clef;
(1) Hint: You may want to use a template with all the staves that you’ll ever be needing, and uncheck those that you don’t want to be present in the new file.
As in every other tool, the changes will not be saved until after your confirmation.
(3) As a next step you may want to run the tool ‘Set staff properties’ to carry out within one dialog window all other needed staff changes (general, visual, midi, instrument, default dynamic velocities).
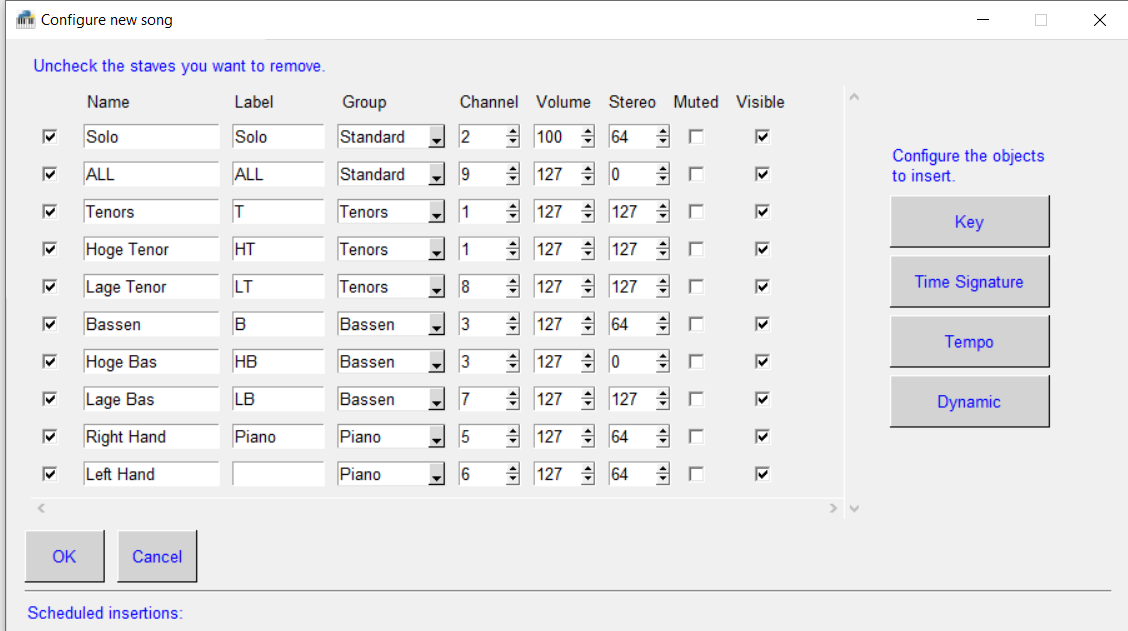
Construct medley
Combine several song files into 1 medley file.
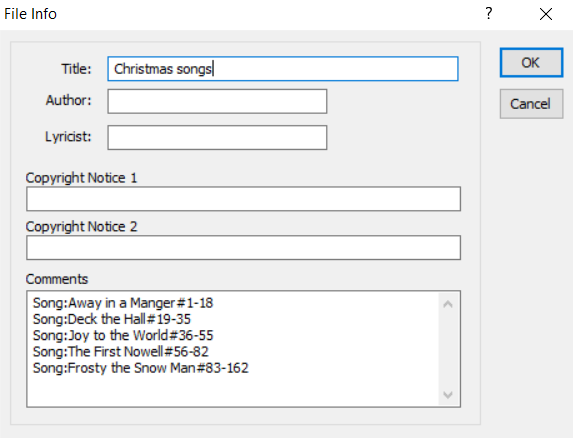
To create a medley file, you have to start this tool from a blank score: Choose ‘File/New’ and select <blank score> from the ‘Song Templates/General’ tab and save it before you go to ‘Tools/User Tools’. This file will be the destination file, in which you add the songs that will make up the medley. You can create the medley file in several steps, so you can also start this tool from an earlier created medley file. (The tool checks the presence of ‘song lines’(1) in the Comments section of the Song Info to decide whether it’s a valid medley file.)
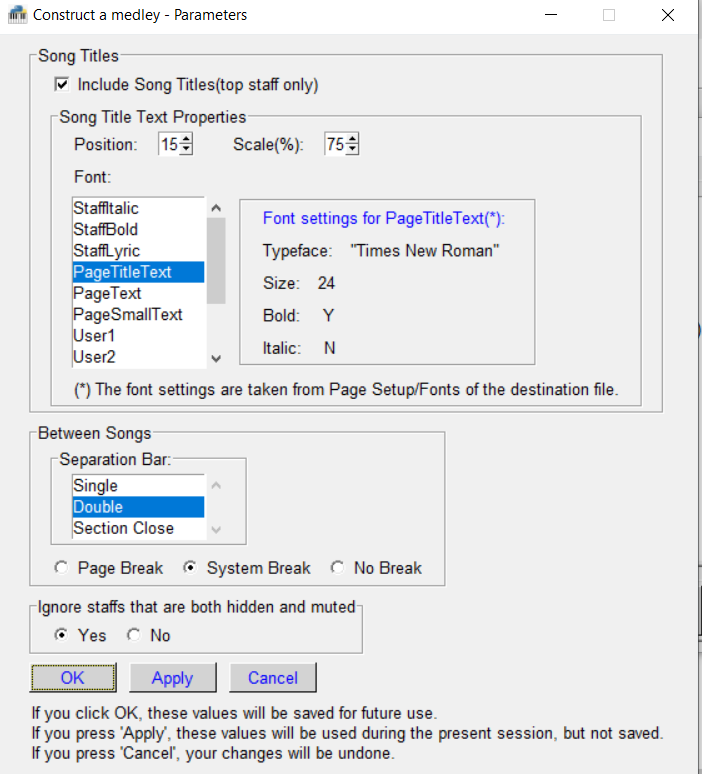
Via the tool parameters you can specify:
Include song titles at the start of each song (top staff).
Position, scale and font for the Song Title text objects.
Type of separation bar between the songs (except when the previous song ends with a Repeat Close): Single, Double or Section Close.
Page break, System Break or no break between the songs.
The tool consists of several stages:
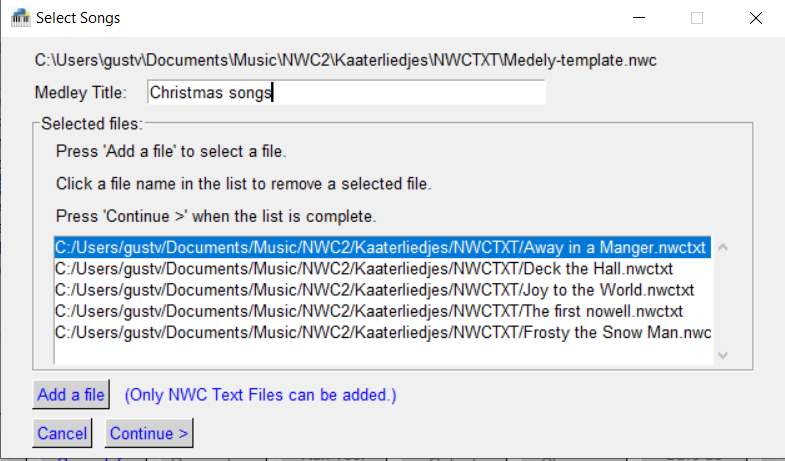
- A popup window ‘Select Songs’.
If you press ‘Add a file’, a Windows Explorer window will be opened.
Important: Only files in NWC Text format can be processed. So maybe you’ll have to open and ‘save as’ one or more of your songs first.
A selected song can be removed from the list by clicking on it.
In this stage you can also set or change the Medley Title.
‘Cancel’ will exit the tool without any changes.
If you have chosen your files, press ‘Continue >’.
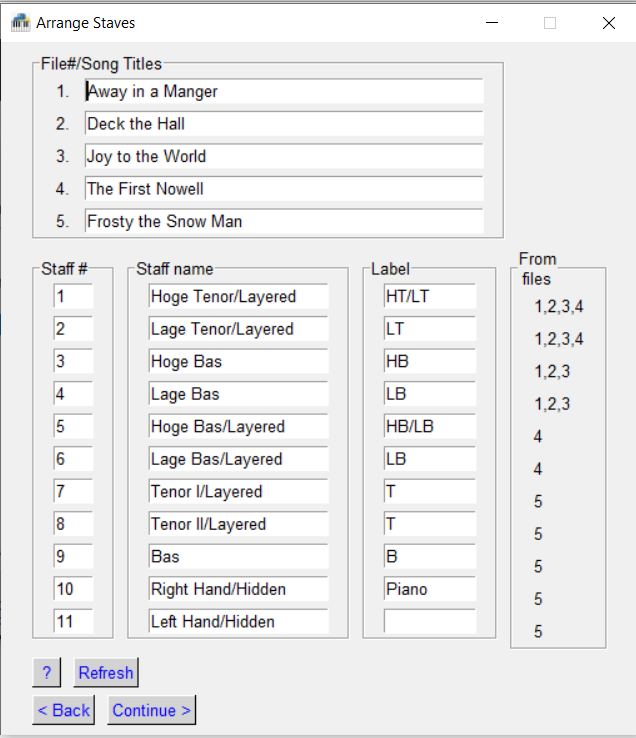
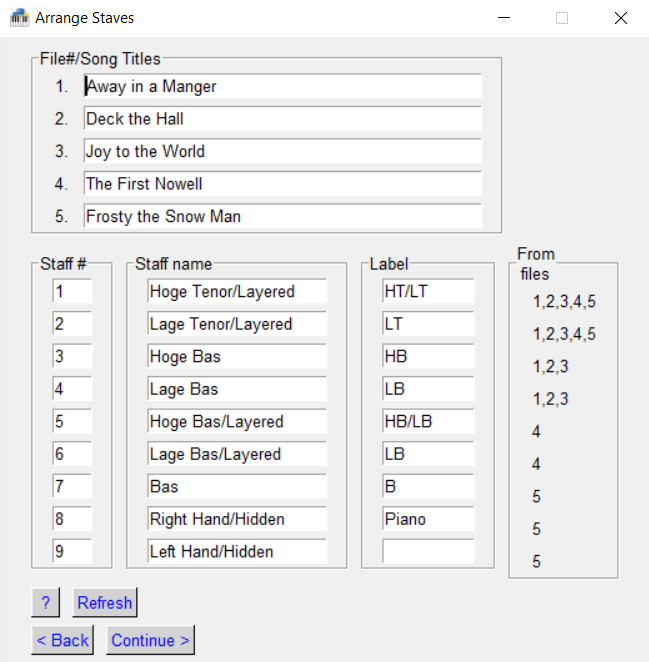
- A popup window ‘Arrange Staves’. Via this window you can:
Reorder the staves
Change song titles(2)
Change staff names and labels
Join staves (by assigning the same name and label)
Press ‘?’ to see more detailed help info
Press ‘< Back’ to return to the ‘Adding Songs’ window.
- Review of the staff properties:
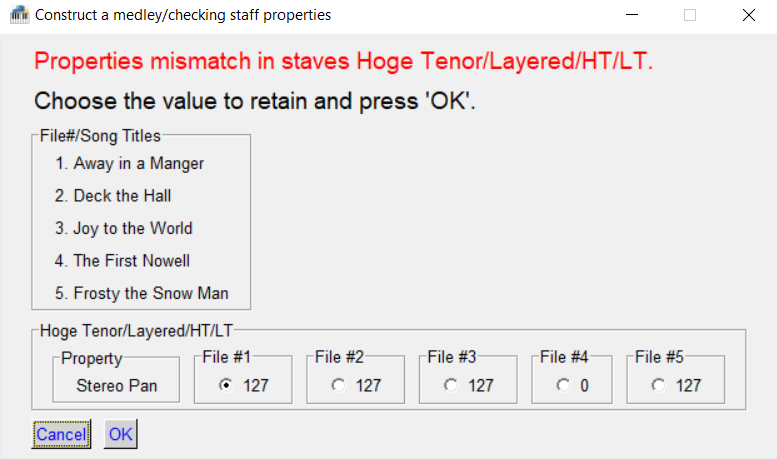
For each staff that appears in several songs, the properties from the different songs are compared. For each mismatch(except for ‘visibility’ and ‘muted’), a popup window is presented where you can choose which values to retain(2). If there are to many mismatches, you may want to press ‘Cancel’, in which the tool is ended without any change. When there’s a mismatch for ‘visibility’, the part of the song with property invisible will be collapsed. When there’s a mismatch for ‘muted’, the appropriate notes will be muted.
- Construction of the medley, according the choices in the Tool Parameters:
Adding ‘song lines(1)’ to the Comments Section of the Song Info.
Adding song titles at the start of each song.
Creating delimiter objects: separation bar, new system or new page.
Inserting rests measures in staves that aren’t part of every song, surrounded by boundary collapse and end collapse objects (3).
- Notes:
A ‘song line’ is of the form “Song:{song title}#{starting measure}-{ending measure}”
Changing the song titles and/or staff properties has only effect in the destination file. The original song files will not be modified.
The inserted boundary changes don’t always give the expected result between the songs, so may be you’ll have to delete or replace some of them.
Tool parameters window:
Select songs:
Arrange staves before modifying:
Arrange staves after modifying:
Staff Properties mismatch:
File Info:
Layer voices
Layer 2 voices and do necessary changes to get a ‘neat’ visual result.
In many song sheets for choirs, each group of two voices is on 1 staff. In NWC, you can do this by entering chords, or by layering each group of two staves.
Entering chords is not very easy + you don’t always have control over the stems of the individual notes of a chord, which is necessary to differentiate between the two voices.
On the other hand, when layering, you not only have to set the stems. In order not to have a messy result after layering, you also have to set the properties ‘Use stem for articulation’, ‘Slur direction’ and ‘Tie direction’.
Furthermore, you have to check the whole staff for situations where you have to set the properties ‘Extra note spacing’ and/or ‘Extra accidental spacing’.
This tool takes care of all this.
In addition:
If both staves have lyrics, the property ‘Placement’ will be set to ‘Top’, resp. ‘Bottom’.
The label of the bottom staff will be changed to the combination of the 2 labels.
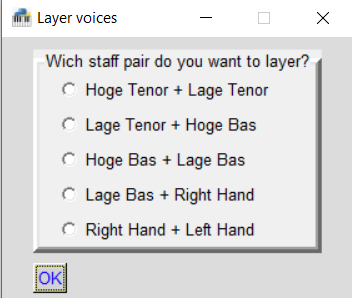
Via a popup window you can choose which pair of staves you want to be layered.
REMARK: Because of the many changes, you’ll be asked if a safety copy of the original file is to be created before layering.
Dialog window example:
Make rehearsal file
Creates a rehearsal file.
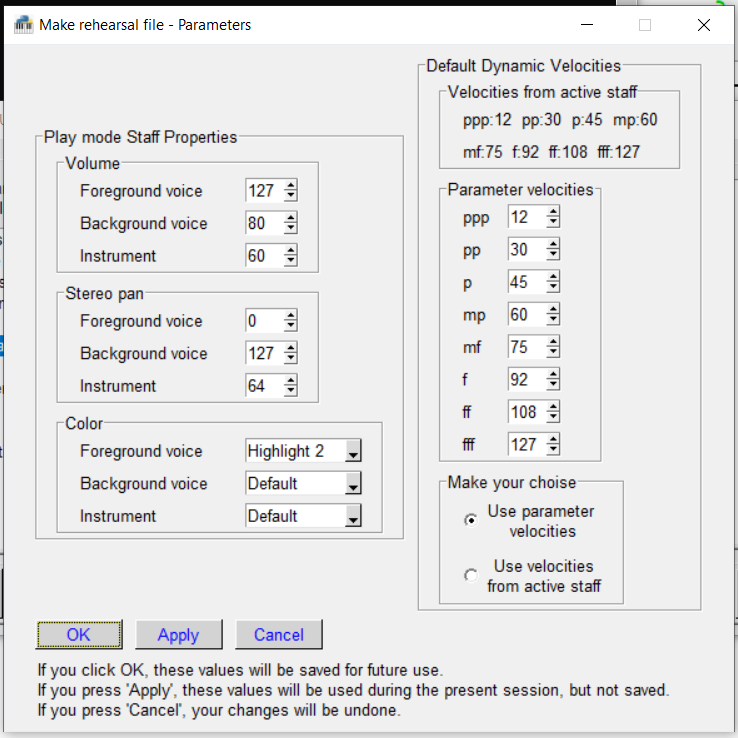
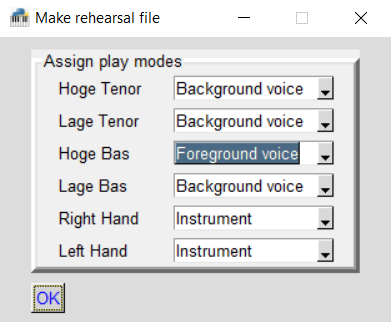
For each staff, you can assign one of three ‘play modes’: background voice, foreground voice or instrument. After you click ‘OK’, the staff volume, stereo pan, color and dynamics will be changed according to the ‘Tool Parameters’.
So, before you run this tool for the first time, take a look at the ‘Tool Parameters’ window.
The left frame shows the ‘Play mode Staff Properties’. Here you can set the staff volume, stereo pan and color for the three play modes.
The right frame concerns the ‘Default Dynamic Velocities’. Here you can choose the values for the default dynamic velocities that will be set in the instrument panel for each staff of your score. These values are used to calculate the velocity and volume settings of the dynamics. (For more information: see document ‘Dynamics.pdf’ in <http://nwc-scriptorium.org/helpful.html#Explanations>) You can either choose for the velocities of the active staff (which are shown at the top op the frame, or for the parameter values.
After you pressed ‘Run Tool’, have set the play modes and pressed ‘OK’:
The chosen default dynamic velocities are copied in each staff.
The staff properties are changed according to the tool parameters.
The velocity and volume settings of the dynamics are calculated as follows:
for a voice staff :
° The ‘custom velocity’ of each dynamic is set equal to the highest value of the default dynamic velocity (‘fff’).
° The ‘custom volume’ is set using Tina Billet’s formula : Volume = default velocity for the dynamic * Staff Volume / highest velocity.
for an instrument staff: the custom velocity and volume are unchecked.
Tip: Use the button ‘Save as’ to create a rehearsal file and add the label of the foreground voice to the file name. You can do this for each voice as foreground while keeping the original file unchanged by answering ‘No’ the the popup ‘Save changes?’
Tool parameters window:
Dialog window example:
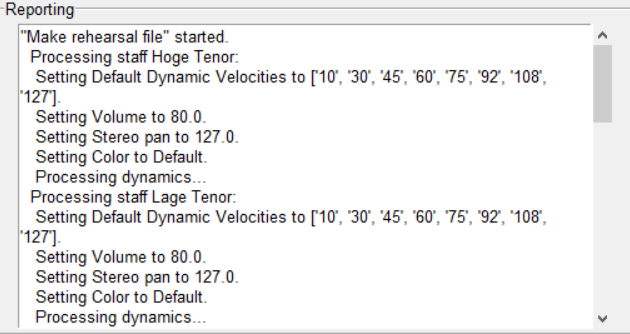
Reporting example:
Organize files
Version management for your NWC files.
The purpose of this tool is to provide a sort of ‘version management’. A possible scenario:
- When you think a draft version of your score is ready to be ‘promoted’ or secured:
register the date last modified in the File Info comments section.
create a read-only copy in a dedicated folder, with one or more suffixes added to the file name to see at a glance the date last modified, the creation date of the copy and/or a ‘version text’.
Then you can safely continue working with the original draft version.
If you want to work again with the secured version, you could unlock it, or leave it locked and create a new, writable copy in your ‘working’ folder.
The tool window:
The date modified, shown at the top of the window, is extracted from the windows file system.
The ‘File Info Comments’ frame shows the comment section of the ‘File Info’ from the input file.
The actions lock or unlock input file will be done after you click ‘OK’.
The other actions that you select in the ‘Actions’ frame are not accomplished until you click one of the buttons ‘Save changes’ or ‘Save as’ in the main window.
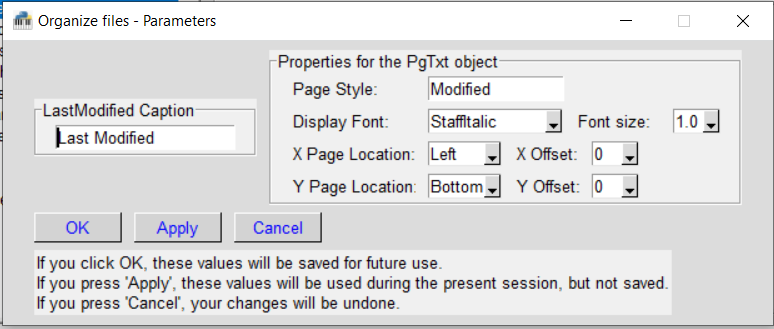
Via the Tool Parameters you can change following values:
The caption for the date modified text (default = ‘Last Modified’
The PageStyle for the print object (default = ‘Modified’)
The font and font size (default = StaffItalic, size 1.0)
The location of the print object (default = bottom left, X- and Y-offset 0)
If you save a copy of the input file, you can add one or more suffixes:
#m, followed by the date modified
#c, followed by the creation date of the copy
#v, followed by a self chosen text
(Remark: Any suffixes of the input file are not retained in the name of the copy.)
Via a popup window you can choose or create the folder for the copy.
Tool parameters window:
Dialog window example:
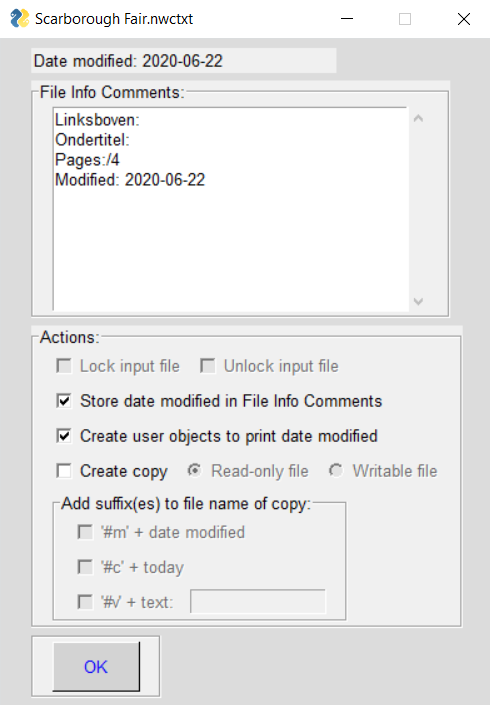
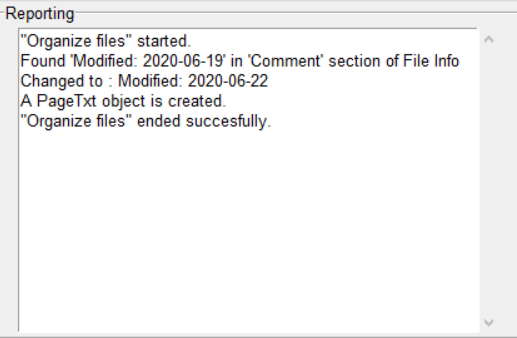
Reporting example:
Search & Modify
Search and Modify.
With this tool you can search a score for all objects of a given type that have some given properties. Next you can:
Inspect where the occur (staff, measure number), with their nwctxt presentation.
Choose an action: ‘Modify’ or ‘Delete.
- For the action ‘Modify’:
Indicate which property(ies) you want to modify.
Fill in the new value(s) in a popup, that resembles the ‘Notation Properties’ window in NWC for the given object type.
- Remarks:
At every moment you can leave to undo your choices or modifications.
On the main window, every input field is a combo box from you can select the appropriate value.
Only those values that are of interest are presented. For instance: If you specified ‘Clef’ as object type and all clefs have the same value for ‘Octave Shift’, that property is not present in the ‘condition’ lines. .
- Detailed description:
- The main window consists of following parts, from top to bottom:
- The frame ‘Make your choices’ to specify:
Where to search (selection, active staff, all staves or visible staves).
The object type to search for.
The ‘Conditions’ frame where you can set up to 6 search criteria. If you specify more than 1 condition for the same property, then all the objects are selected that satisfy any of these criteria. Criteria for different properties must be satisfied separately. At the bottom of the conditions frame you can see a verbose description of your selection criteria. It’s updated after every completed condition line.
- A status line, that indicates:
The object type to search for.
The number of objects found (dynamically updated).
- A button ‘Show’.
When clicked a popup window will show the location and nwctxt presentation of the objects that satisfy the criteria.
The ‘Action’ line, with choices ‘Modify’ or ‘Delete’
- The ‘Modifications’ frame, where (if your action = ‘Modify’) you have to specify at least 1 and at most 4 properties.
Only those properties can be specified that are present in the ‘Notation Properties’ window for the object type. e.g.: for a note you can’t change the position, duration, accidental, staccato,….
- Three buttons:
- The action button. The caption will indicate the action you chose.
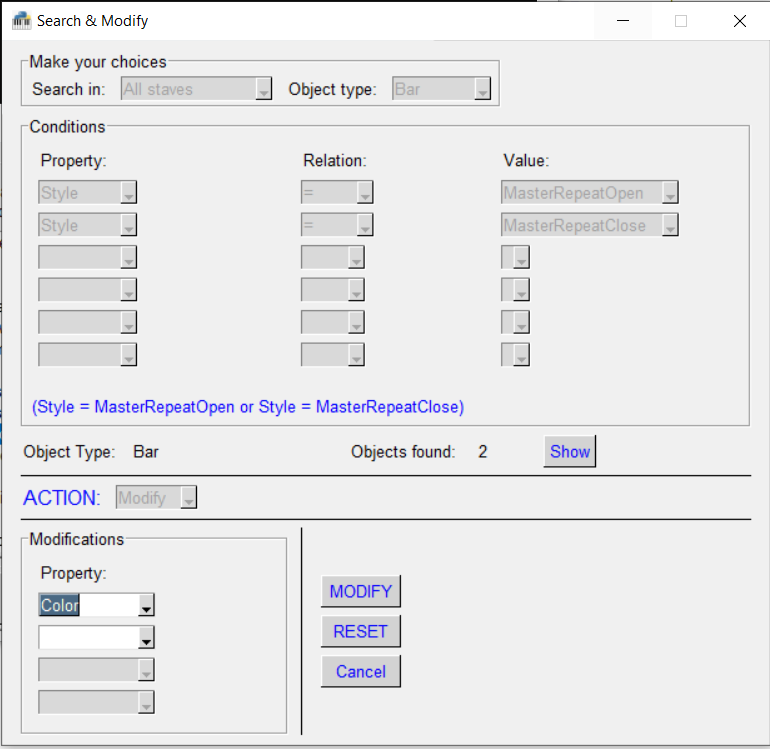
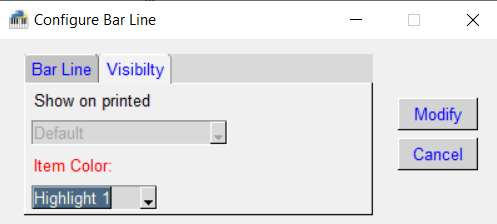
If the action is ‘Modify’, a popup is presented that resembles the ‘Notation Properties’ window of NWC, in which the fields contain the values of the first object found. Only the fields for the properties you selected in the modification frame will be enabled. After you entered your new values, these will be set in each found object. All the other properties of each object remain unchanged.
The ‘Reset’ button. When clicked, every input is cleared so you can restart your input.
Finally a ‘Cancel’ button to leave without any action taken.
Dialog window example:
Example edit window
Set staff properties
Set general, visual and midi staff properties for every staves in one window.
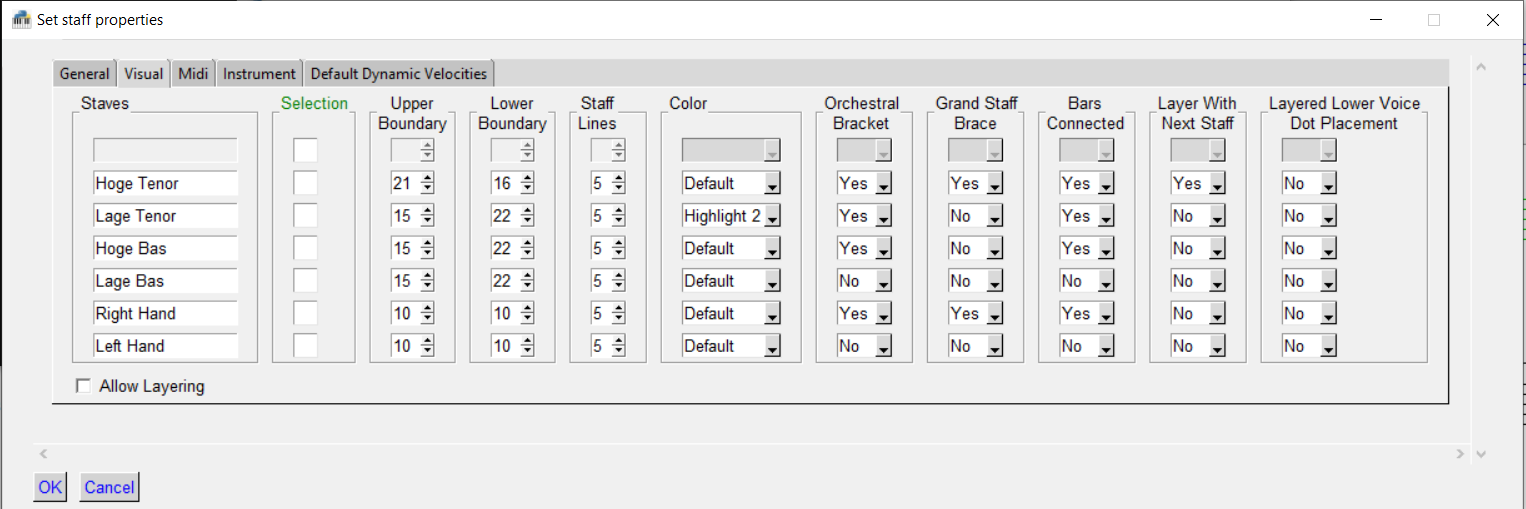
The window of this tool contains 5 tabs: ‘General’, Visual’, ‘Midi’,Instrument and ‘Default Dynamic Velocities’. These tabs correspondent with the tabs or the Staff Properties Window of NWC, with following exceptions: - In the ‘Visual’ tab, you can also change ‘Allow layering’ (at the bottom), although it’s not a staff property.
The ‘Midi’ tab doesn’t contain the playback device.
In the ‘Instrument’ tab, the instrument name, patch and bank are showed but can’t be changed.
The default dynamic velocities have their own tab.
In each tab you have a staves column, a selection column, followed by some property columns. If you want to change a certain property for a certain staff, just change the value in the appropriate row/column combination.
But it’s also possible to change a property for more than one staff in one go, via the top row. The cells in the top row are disabled until you tick one of more boxes in the selection column. (Ticking the top most box will check all boxes.) The staff names of the selected rows will appear in green. You can then change a property for the selected staves in one go via the op row.
If needed, you can repeat this for other selections and properties. (Ticking the top most box twice will remove all selections.)
Dialog window example:
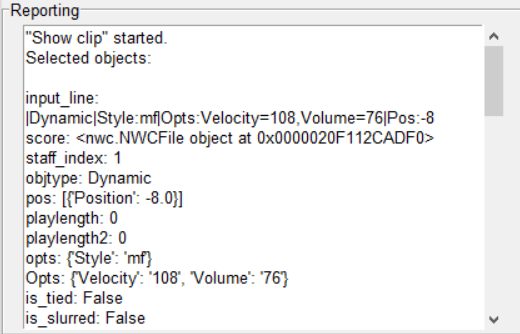
Show clip
Shows ‘translation’ of the selected object(s) into the internal representation that’s used by the tools.
This tool shows a translation of the selected object(s) into the internal representation that’s used by the tools.
Reporting example:
Show collapsible sections
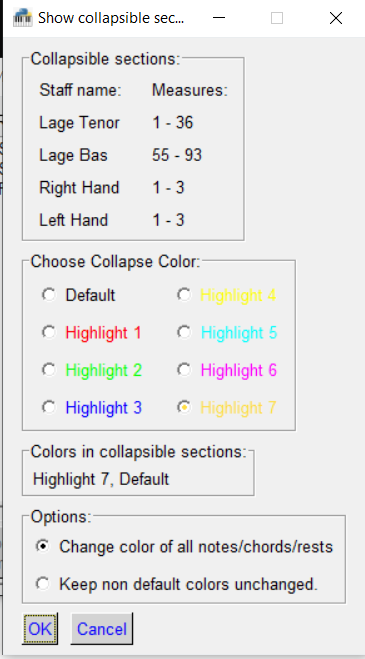
Show collapsible sections.
In NWC you can mark collapsible sections with the boundary objects ‘Start a collapsible section’ and ‘Cancel/forbid collapse from this bar’. But then it’s very hard to see them in the editor, you’ll have to use ‘Print preview’ to see the effect.
This tool is intended to solve that problem by coloring the notes, chords and rests of a collapsible section with a color of your choice. After that it’s easy to locate these sections in the editor.
Remark: You still have to do a print preview to see the real effect, since collapsing will only start and end at system breaks. But at least now you know in what part of your score they occur.
- The tool show a window consisting of 4 frames:
‘Collapsible sections’: Shows the staves with collapsible sections and the measures from - to.
‘Choose Collapse Color’
‘Colors in collapsible sections’: Shows which colors are now present in the collapsible sections for the notes, chords and rests.
- ‘Options’: If there’s both ‘Default’ and at least 1 ‘Highlight’ color in the collapsible sections, you can indicate:
Change the color of all notes/chords/rests in the collapsible sections.
Keep the non default color(s) unchanged.
You can click ‘OK’ to do the changes, or ‘Cancel’ to leave without changing anything.
Show file
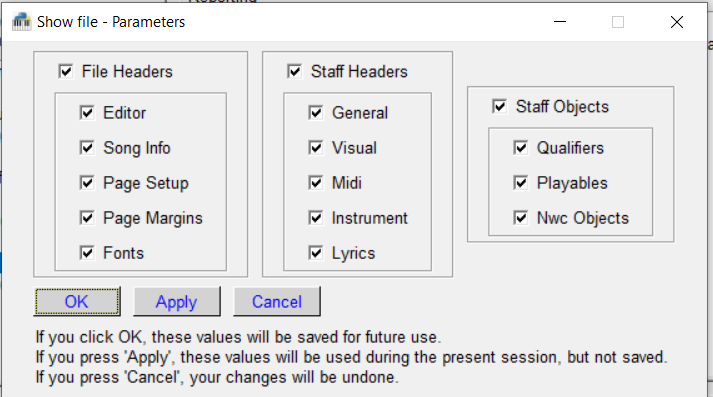
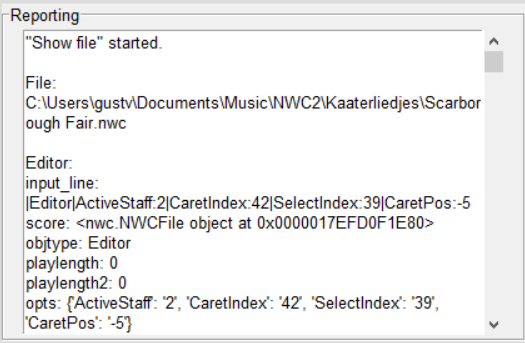
Shows ‘translation’ of the file objects into the internal representation that’s used by the tools.
This tool shows a translation of the file objects into the internal representation that’s used by the tools. The tool parameters determine the objects that are shown.
Reporting example:
Transfer selection
Copies the selected objects to the other staves.
The selected objects are copied to the other staves. The tool parameters determine whether or not the hidden staves are processed.
Tool parameters window:

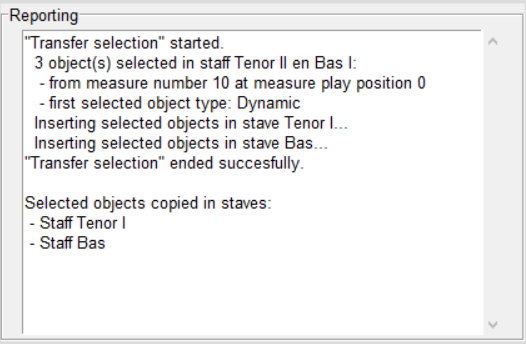
Reporting example:
